
Categories
Tags
Archives
The Preferred Method Of High Pressure Injection Pump Placement
-
Step 1 – Packer Placement Preparation – Drill and Flush
Gear
Wear adequate protective gear and goggles at all times and follow data sheet and MSDS instructions.
Cleaning
If necessary, clean the face of the crack or joint by wire brush, pressure washing, or similar. A clean surface will help to identify cracks and problem areas more clearly.
Spacing
Identify the drill hole spacing, pattern and depths. Depending on the width of the crack, space the packers at an approximate distance of 6”-18” , 10cm-45cm. In hairline cracks the water stop and leak-seal grout won’t travel as far which results in tighter packer spacing, while wider cracks permit for easier flow and wider packer spacing. Stagger drill holes from one side of the crack to another (left / right).
At 45 Degree High Pressure Injection Pump for sale
45 Degree Angle Drilling and Packer Placement
The preferred method of packer placement is at a 45 degree angle. In structures thicker than 6 inches (12-15cm) recommends a 45-degree angle as the best approach to intersect the crack halfway through the structure. This is achieved by not drilling directly into the crack, rather to begin drilling a few inches to the left or right of the crack in an angled approach to the crack itself. This technique permits the ‘from the inside out’ product flow which is required for best penetration of the crack. For example, on a 10” thick concrete wall you move off the crack by 4”-5” or 8cm-10cm and drill at a 45-degree angle towards the crack to hit your target. It helps to make an initial straight drill entry and then tilt the drill to the desired angle. Typical drill spacing along the surface of the crack ranges from 6–12 inches or 10cm-20cm depending on the thickness of the crack. Hairline cracks require closer spacing than larger cracks because the material will not travel as far. Stagger drill holes from one side of the crack to another and intersect the crack while drilling.
Exceptions to the 45 Degree Injection Rule
Straight Drilling
Drilling into joints, such as concrete tunnel segments, is mostly performed in a straight fashion. Also, concrete structures of less than 6” thickness may not permit angle drilling as the concrete can crack and spall. The same may occur in badly deteriorated concrete substrates and in concrete of inferior quality. In such conditions, it is advised to drill and install packers directly into the crack without penetrating the structure completely.
Drill Dust
While drilling deeper holes pull your drill bit out in repeatable motions, to remove the drilling dust and prevent your drill from binding up.
Rebar
Most concrete structures are full of rebar steel reinforcement for structural strength.
In a perfect, crack free structure, concrete protects the rebar from corrosion by shielding it from moisture and air and providing a higher pH environment. However, as cracks develop the shield is compromised and air and water lead to carbonation and the rebar corrodes and expands while forming rust. The expansion of rusted rebar creates high forces against the concrete resulting in deterioration, more cracks and spalls. Chemical grout injection minimizes these processes.
Rebar slows down the drilling process. As your drill bit makes contact with rebar the sound changes and the progression will slow down or may stop. Some drill bits permit drilling through rebar. This is generally not recommended and may even be prohibited. At this point moving the drill hole is the only option. If you hit rebar repeatedly, try drilling straight into the crack. Dead end drill holes need to be patched and sealed prior to injection to prevent leakage.
Flushing / Cleaning the Holes from Concrete Dust and Debris
Debris from drilling can thicken the product during injection, resulting in higher injection pressures and reduced penetration. It is best practice to remove concrete dust and debris from the drill holes by flushing with a water hose until clean water is observed. Simply use a water hose to flush debris from the hole. Vacuuming out the dust can also be helpful if flushing is impossible. Blowing out the debris is another option, however, be aware that dust can be an inhalation hazard and appropriate gear is mandatory. Cleaning of holes won’t be necessary if water is actively running from your drill holes.
Step 2: Mechanical Packer Installation – Install and Flush
Mechanical Packer Basics
The packer and the drill holes must be of a quality that withstand the injection pressures without leaking or moving inside the crack. Caution: Even the best packer may break lose or pressure leak in some circumstances.
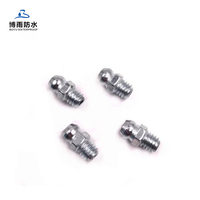
Mechanical packers have a threaded shaft with a rubber base. Following insertion, tightening of the threaded shaft will compress the rubber inside the drill hole, resulting in a compression seal. Typical diameters of these packers can range from 1/4–3/4 inches with industry standards being 3/8–5/8 inches. In poured concrete substrates, the drill hole will act as a solid channel which will direct the resin to the crack which permits the usage of shorter length packers. In substrates which may exhibit voids such as block wall, stone and brick.
Mechanical Packers Installation
Mechanical packers are tightened to seal against the drill hole by expanding the rubber seal. You may pre-tighten the packer by hand to snugly seat the rubber all the way (approximately ¼”/5mm) inside the drill hole. Correct installation will prevent concrete from cracking around the outside of the drill hole. Depending on the packer design it is highly recommended to use a suitable ratchet/nut or wrench to tighten the packer. Electric drivers are also popular. Tighten packers securely to withstand injection pressures! But do not over tighten.
Seat the ports with a hammer at moderate force. An electric driver or hand tool and suitable socket are used to screw the zerk fitting into the port. In most applications, hammer-in ports do not achieve the same injection pressures as mechanical packers and should only be used where maximum injection pressures are not necessary.
Packer Connectors
Typically packers are equipped with a quick connect system which is either of a zerk type or button head / slide coupler type.
Zerk Type Connector
The zerk type is most common. The applicator has to push the coupler over the zerk fitting and hold it in line with the packer. To disconnect the applicator “breakes” the connection by pushing the connector sideways.
Button Head / Slide Coupler
The button head type offers the most secure connection. The operator slides the coupler on and off the packer which makes the connection very secure, tight and less prone to unexpected disconnection and leakage. When done correctly the applicator does not have to hold the coupler in place. This is a big advantage in over-head injection and where large volume of product has to be pumped through one packer.
Flushing the Cracks Prior to Injection
It is recommended and very good practice to flush dry and not actively leaking cracks with water prior to injection. Flushing removes debris, indicates material flow, expected product penetration distance and provides moisture for the product to react with. If the crack is not accepting water, your hole may not be connected to the crack. In this case, drill from the opposite side of the crack and water test again. Flushing should be performed at lowest pressures possible to avoid damage to the concrete. Flushing is not always possible as the required equipment may not be available. In most cases, the injection will be successful without introducing extra water. Even if the product does not come in contact with water immediately, it will cure over time as natural moisture in concrete will stimulate a cure and hardening, possibly at a delayed pace.
Flushing Water Pump
For flushing, it is recommended to have a dedicated water injection pump on site. Never water test with the same pump from which polyurethane resin will be dispensed. Polyurethanes are water activated and even small traces of moisture can cause pump failure.
Step 3: Injection WaterStop Products
Before You Start Injection
Prior to injection please read instructions on the product datasheet. Before preparing the Product for injection make sure your pump is fully operational and completely free of any moisture.
Injection Procedure
When your products are ready for injection have a cup handy to dispose of some resin to assure purity. Always start the pump at the lowest pressure setting. After coupling your grout injection hose to the secured and tightened packers, begin the injection process.
Utilize the shut-off valve at the end of your injection hose whenever the hose is moved. Starting from the bottom up, connect your injection line securely to the packer and begin with the lowest pressure that will move resin into the crack. Typically injection pressure will drop as soon as the material flows but pressure may have to be increased as products thicken and move into tighter cracks and fissures. Keep injecting at a slow rate as resin starts to show and flow from the crack. You may want to stop and restart the process for a minute to permit material to react and thicken. Monitor the consumption rate and stop injection when consumption equals leakage. A common observation will be the decrease of water flow from the face of the crack and/or reacting material exiting the face of the crack. This is a good indication of successful penetration and results. When the product does not move further along the crack disconnect and move to the next port. The applicator must ensure that enough material is injected into each crack to achieve good product density for a durable seal. It is advised is to inject three to five packers while observing product flow, travel and refusal from the crack. It is important to go back and reinject those three to five packers again — typically up to three times (1-2-3 at 45 degree) or until refusal of product. It is important that the crack is filled adequately with as much product as possible without losing to much product oozing from the crack. Adequate material consumption and product density in the injected area must be monitored to achieve a solid and successful repair. Packers that still consume considerable amounts of product should be injected a third time or as much as necessary to create a permanent seal.
Quality Injection Job
Often injection is a two man job – you need someone operating the valve and hose-and another manning the pump.
Create a dense seal! It is quite possible to achieve differing results on the same injection application due to inadequate material consumption alone. If the crack is not accepting any product, you may not have drilled deep enough or the crack is directed in the opposite side. In this case, drill from the opposite side of the crack and ensure to intersect the crack.
Packer Removal
After allowing the material to fully cure, packers can be removed by loosening the shaft. Some applicators leave the rubber base in the wall and then patch the drill hole while others remove the entire packer prior to patch. In some injection applications packers even remain in place permanently. This is the applicator or owner’s preference. A final cleanse of the face of the crack is necessary to remove cured product via wire brush, pressure washing, etc. The substrate is now ready for final finish.
We are a waterproof company, offers Injection Pump Machine wholesale,Injection Pump,Injection Packers, Polyurethane injection grouting and so on, Please contact us anytime.